

Flagpole Locking Mechanisms Explained: 2026 Guide
Table of Contents
- How Telescoping Flagpole Locking Mechanisms Work
- The Five Lock Types Compared: Friction, Twist, Spring Button, Pin, and Ball-Bearing
- Flagpole Friction Lock: How It Grips and Where It Fails
- Telescoping Flagpole Pin Lock: Positive Engagement and Wear Points
- Lock Strength, Holding Force, and Resistance to Section Slippage
- Telescoping Flagpole Lock Slipping: Symptoms and What Causes It
-
Diagnosis and Repair by Symptom: Sticking, Slipping, and Broken Locks
- Symptom: The section creeps down slowly over hours
- Symptom: The section drops suddenly in a gust
- Symptom: The lock will not hold at any height
- Symptom: The lock sticks and will not release
- Symptom: The pole slips in only one wind direction
- Symptom: The pole rattles in wind but does not drop
- The repair decision, in one line
- Flagpole Lock Maintenance: Intervals, Lubrication, and Inspection
- Flag Attachment, Swivel Rings, and Preventing Tangling
- Safety and Load Limits for Telescoping Flagpoles
- Materials, Construction, and What Lock Durability Actually Depends On
- Replacement Parts and Compatibility for Locking Assemblies
- Choosing a Locking Mechanism by Use Case: Home, Coastal, and RV
- Conclusion: Matching the Lock to the Pole and the Weather
- Frequently Asked Questions
Last Updated: October 14, 2026
How Telescoping Flagpole Locking Mechanisms Work
Flagpole locking mechanisms are the internal systems that hold each pole section at its extended height, using friction, twisting, spring pins, or ball bearings to keep the sections from sliding back down. At Armor Flagpoles, we field questions about these locks more than any other part of the pole.
The sequence is the same on nearly every telescoping design. You raise the pole from the bottom section upward, engage each lock as that section reaches full extension, and the pole holds itself at height.
Most people never think about the lock until it fails. That is the wrong way to buy a flagpole.
Extension, Collapse, and the Locking Sequence
Extension always runs bottom to top. Each telescoping section slides out of the one beneath it until the lock catches, and the section engagement is what transfers load down the pole. Collapse runs top to bottom for the same reason in reverse: the top section has the least material around it and needs to come down first.
Two rules prevent most lock damage:
- Never force a section past its stop point. If it will not extend, the lock is not released, not stuck.
- Never collapse a lower section while an upper section is still extended. That loads the lock sideways.
A retractable flagpole depends on that sequence holding every time. Get it right and the locking mechanism stays clean for years.
The Five Lock Types Compared: Friction, Twist, Spring Button, Pin, and Ball-Bearing
Five lock families cover almost every telescoping flagpole on the market, and each trades holding strength against convenience in a different way. Knowing which one you are buying tells you more about real-world performance than any height or finish spec.
| Lock Type | How It Engages | Holding Strength | Best For | Main Weakness |
|---|---|---|---|---|
| Friction lock | Collar compresses around the section | Moderate | Light flags, mild climates | Slips as surfaces wear |
| Twist lock | Rotating collar tightens the joint | Moderate to high | Adjustable height, tripods | Over-tightening cracks collars |
| Spring button | Button pops into a drilled hole | High | Fixed heights, quick setup | Hole wear and button sticking |
| Pin lock | Pin passes through aligned holes | High | Heavy loads, permanent setups | Requires two-hand operation |
| Ball-bearing | Bearings clamp the section under load | High | Frequent extension, swivel tops | More parts to service |
Friction and twist locks rely on clamping force. Spring button and pin locks rely on positive engagement, meaning a physical part sits in a hole. Ball-bearing mechanisms sit between the two: they clamp, but through rolling elements that reduce wear on the section wall.
Flagpole Friction Lock: How It Grips and Where It Fails
A flagpole friction lock grips by squeezing a collar or sleeve around the pole section until the resulting friction exceeds the load pulling the section down.
Engage. A friction lock engages by hand.
Hold. Holding force comes from clamping pressure multiplied by contact area, minus whatever the surface condition subtracts.
Wear. Friction locks wear in two places. The collar lining compresses permanently and loses its spring-back, and the section wall polishes smooth where the collar grips.
Release. Release is the friction lock's best feature.
What most guides miss is that friction lock failure is usually a maintenance problem, not a design problem.
Where friction locks genuinely fall short: heavy flags in sustained wind.
Telescoping Flagpole Pin Lock: Positive Engagement and Wear Points
A telescoping flagpole pin lock holds a section by passing a pin through aligned holes in two sections, which means the load is carried by the pin itself rather than by clamping friction.
The wear points are predictable. The pin wears first, then the hole edges in the inner section, then the hole in the outer section.
Spring-button and pin-and-pinch systems are close cousins. A spring button is a pin on a spring that pops into a hole automatically; a pin-and-pinch system uses a pinch collar to hold the button in place. Both share the same wear pattern.
Lock Strength, Holding Force, and Resistance to Section Slippage
Lock strength is the load a lock can hold before the section moves, and it is governed more by section diameter and wall thickness than by lock design alone.
Three variables decide real holding force:
- Section diameter. Larger diameter means more contact area and more resistance to bending under load.
- Wall thickness. Thicker walls resist ovalizing, which is what lets a lock lose grip progressively.
- Lock engagement depth. A pin through two thick walls bears on more material than one through two thin walls.
This is why material specification matters more than lock marketing. Our poles use 10-gauge 7000-T8 aluminum, and the 10-gauge wall thickness is the number that keeps sections from ovalizing under lock pressure.
Holding strength also drops as sections wear. Any lock loses force over time as surfaces polish and clearances open up. The question is how long that takes, and that comes back to wall thickness and material hardness.
Telescoping Flagpole Lock Slipping: Symptoms and What Causes It
Telescoping flagpole lock slipping shows up as a section that creeps down over hours, drops suddenly under a gust, or will not hold at all above a certain height. Each symptom points to a different cause, and treating the wrong one wastes time.
Here is how to read the symptom:
- Slow creep over hours. Contamination on the section wall or collar. Clean both surfaces first.
- Sudden drop in a gust. Lock is engaged but not fully seated. Re-extend and confirm the lock catches.
- Will not hold at any height. Worn collar lining, worn pin, or ovalized holes. Inspect the lock parts directly.
- Holds when new, slips after a season. Surface wear or, on friction locks, a collar that has compressed permanently.
A common mistake is tightening a friction collar harder to stop slipping. That works once or twice, then cracks the collar or deforms the section wall, and now you have two problems. Clean first, tighten second, replace third.
If the pole slips only in one wind direction, the section is probably bent rather than the lock being worn. Roll the section on a flat surface to check.
Diagnosis and Repair by Symptom: Sticking, Slipping, and Broken Locks
Most lock guides give you a numbered checklist. A checklist does not help when your pole is doing one specific wrong thing. This section works the other way: start with the symptom, follow the branch, and stop when you reach the cause. Diagnosis starts with isolating which section is failing, because the fix differs by lock type and by whether the problem is contamination, wear, or damage. Work top-down and test one section at a time.
Symptom: The section creeps down slowly over hours
This is almost always a friction or twist lock losing clamping force, not a broken part.
- Clean the section wall and the collar interior with a dry cloth. Retest under load for an hour.
- If it still creeps, inspect the collar lining for a permanent flat spot or a compressed set. Replace the collar assembly if the lining no longer springs back.
- If the collar is fine, check the section for a polished band where the collar grips. A mirror-smooth band means the wall has worn and the section, not the collar, is the limiting part.
Symptom: The section drops suddenly in a gust
The lock is engaged but not fully seated. This is a positive-engagement problem, not a wear problem.
- Collapse the section fully, then re-extend it until you feel or hear the pin or button seat.
- On a spring-button lock, confirm the button protrudes fully through the outer hole. A button that sits flush is not seated.
- On a pin lock, confirm the pin passes through both walls, not just the outer one. A pin that stops short is the single most common cause of a sudden drop.
Symptom: The lock will not hold at any height
This points to worn parts rather than contamination.
- Inspect pin holes for ovalizing. A hole that has stretched into an oval lets the pin rock and lose bearing.
- Inspect the pin or button for a bend or a flattened tip.
- Inspect the collar for a cracked or missing lining.
- Replace the worn part. Do not compensate by tightening a friction collar harder or by drilling a new hole.
Symptom: The lock sticks and will not release
Sticking is usually corrosion film or a dry mechanism, not wear.
- Clean the exposed mechanism with a dry cloth. On an aluminum pole, a sticking lock often responds to cleaning alone.
- Apply a thin film of lubricant only to moving metal parts, never to a friction-lock clamping surface.
- If the button or pin still will not move, the spring has likely failed. A snapped spring or a sheared pin needs a replacement part; there is no field repair that restores original strength.
Symptom: The pole slips in only one wind direction
This is not a lock symptom at all. A section that slips in one direction and holds in another is usually bent, so the lock cannot seat squarely. Roll the section on a flat surface to check for a bend or a wobble. A bent section will not align with its lock no matter how clean it is.
Symptom: The pole rattles in wind but does not drop
Rattle means the lock is holding but the joint has developed play. On a pin lock, this is early hole ovalizing. On a friction lock, it is a collar that is no longer fully compressing. Neither is an emergency, but both accelerate wear, so address them before the next storm season.
The repair decision, in one line
Clean first, re-seat second, replace third. If cleaning and re-seating do not fix it, the part is worn and no amount of adjustment will restore its original holding force. Replacement parts are matched to section diameter, wall thickness, and lock type, so identify those three numbers before you order.
20 Ft Superior 1 Telescoping Flagpole Kit →
Expected result: the section holds under hand pressure at every height, and the lock releases with normal effort.
Flagpole Lock Maintenance: Intervals, Lubrication, and Inspection
Maintenance is what separates a pole that lasts its full warranty from one that needs lock parts in year three. The schedule is simple, and it takes minutes.
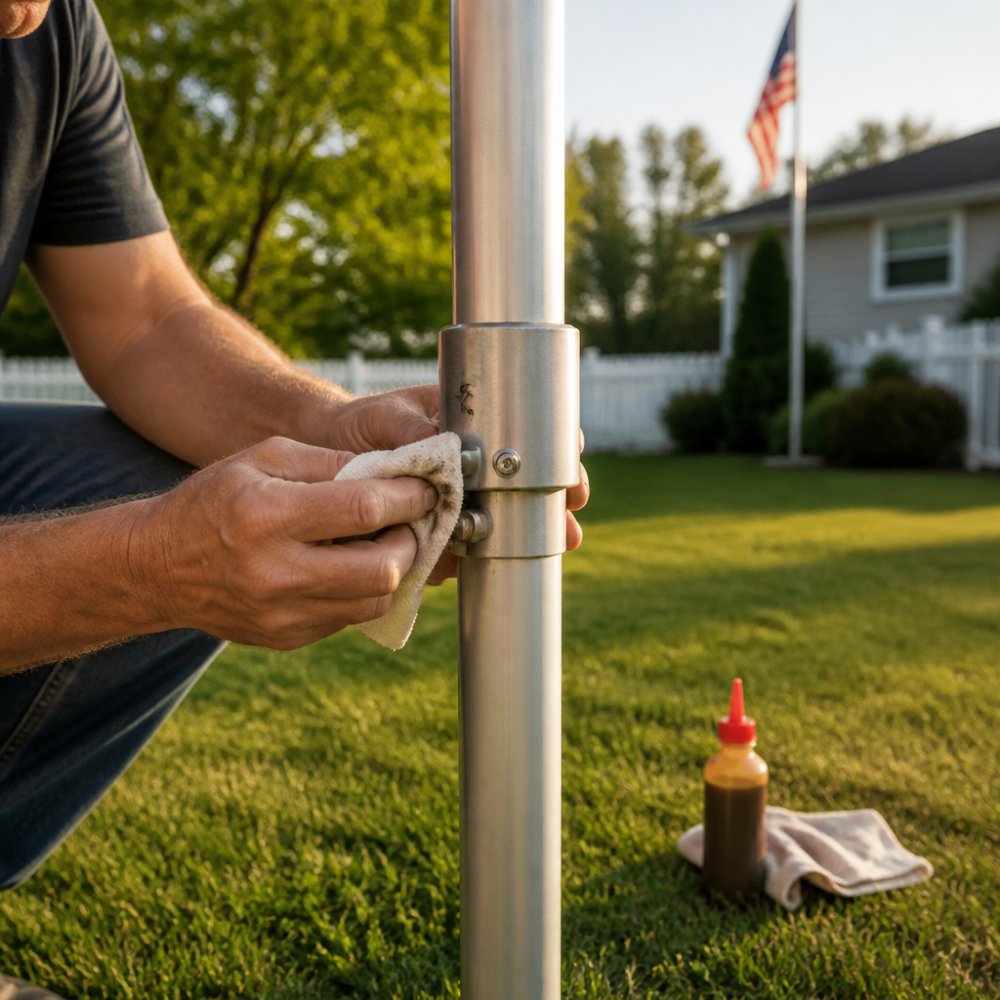
Inspect locks twice a year at minimum, and after any significant storm. Coastal properties with salt spray should inspect quarterly, because salt film accelerates both corrosion and friction loss.
What to do at each inspection:
- Wipe each section wall and lock surface with a dry cloth.
- Check that each lock engages fully and releases smoothly.
- Look for ovalized holes, flattened collars, or bent pins.
- Confirm sections are straight by rolling them on a flat surface.
- Apply lubricant only where the manufacturer specifies it, and only to moving metal parts, never to friction-lock clamping surfaces.
The thing nobody tells you about lubrication is that more is not better. Excess lubricant collects grit, and grit is what wears locks out. A thin film on a pin or a spring is enough.
Flag Attachment, Swivel Rings, and Preventing Tangling
Flag attachment hardware determines how much load your lock actually sees, because a flag that whips and snaps transfers shock into the pole every gust. Swivel rings and free-spinning rings let the flag rotate with wind direction instead of fighting it.
Flag clips connect the flag grommets to the attachment points. Stainless-steel spring-loaded clips resist corrosion and hold grommets securely.
Preventing flag tangling comes down to three habits:
- Use a pole-top ball-bearing swivel system so the upper attachment rotates freely.
- Attach the lower grommet to a beaded retainer ring that can spin around the shaft.
- Add a flag weight to the bottom ring in high-wind locations to keep the flag from wrapping.
Our 30 Ft Heavy Duty Superior 2 kit includes a 1 lb 4 oz flag weight for exactly this reason, and the ball-bearing swivel system with white beaded retainer rings handles the rotation.

Safety and Load Limits for Telescoping Flagpoles
Load limits exist because the lock and the section share the load, and exceeding either one causes failure at the weakest point.
Overloading shows up in specific ways. Sections bend above the lock, locks creep under sustained load, and the pole leans in a steady wind rather than standing straight. Any of those means you are over the limit.
Five safety habits prevent nearly every failure:
- Lower the pole before severe weather rather than testing it.
- Never extend a pole near overhead power lines.
- Keep people clear of the base during extension and collapse.
- Inspect locks after any storm before flying again.
- Replace worn lock parts rather than flying on a compromised lock.
A flagpole is a lever, and the base and lowest lock carry the most bending load. If you are going to inspect one section, inspect the bottom one.
Materials, Construction, and What Lock Durability Actually Depends On
Lock durability depends on the section wall it grips, not just the lock itself.
Aluminum poles are commonly built from 6000-series or 7000-series alloys. The 7000-series alloys are stronger, and the T8 temper is a heat treatment that raises yield strength further.
Section count matters too. More sections mean more locks and more joints, which is more places to maintain. A five-section pole has four telescoping joints to inspect; a seven-section pole has six. Fewer, thicker sections generally mean fewer lock problems.
This is the spec that answers the "why spend more" question. Our 15-year all-weather pole warranty exists because the wall thickness and alloy are specified to resist wear.
Replacement Parts and Compatibility for Locking Assemblies
Replacement parts availability is the difference between servicing a pole and replacing it, and compatibility depends on matching section diameter, wall thickness, and lock type. Parts are not interchangeable across brands or even across models with different base diameters.
What to have on hand for a telescoping pole:
- Spare locking pins or spring buttons matched to your section diameter
- Replacement collar assemblies for friction or twist locks
- Spare flag clips and beaded retainer rings
- A flag weight for high-wind locations
When ordering, match three numbers: the outside diameter of the section the lock grips, the wall thickness, and the lock type.
Our kits ship with the pole and accessories in separate boxes, and the locking assemblies are matched to the specific model. The 20 Ft Superior 1 uses a 2¾-inch base with five telescoping sections; the Superior 2 models use a 3½-inch base.
Choosing a Locking Mechanism by Use Case: Home, Coastal, and RV
Lock choice should follow where the pole lives, how often it moves, and how much wind it sees. The same pole is not the right answer for a sheltered backyard and an exposed coastline.
| Use Case | Priority | Recommended Lock Approach | Why |
|---|---|---|---|
| Sheltered home | Ease of use | Friction or twist lock | Simple, adequate for light flags |
| Coastal, high wind | Holding strength | Pin or ball-bearing | Resists sustained load and salt wear |
| RV and mobile | Speed of setup | Spring button or ball-bearing | Fast extension, no tools |
| Permanent display | Security | Pin lock | Positive engagement, minimal creep |
| Frequent flag changes | Convenience | Ball-bearing with swivel top | Smooth rotation, less tangling |
For a coastal property, the deciding factor is not lock type alone but the section wall behind it.
For a permanent home display in a windy area, we would choose a pin or ball-bearing lock on a thick-walled pole every time. The extra effort at setup is minutes; the difference in holding strength is years.
Conclusion: Matching the Lock to the Pole and the Weather
Every lock question comes back to the same trade-off: convenience against holding strength, and holding strength against the wall thickness that makes it possible. A friction lock on a thin pole is a two-year pole. A pin or ball-bearing lock on a thick-walled section is a fifteen-year pole.
If you are replacing a pole whose sections got stuck or whose locks gave out, the fix is not a different lock on the same thin wall. Armor Flagpoles provides telescoping flagpoles from 10-gauge 7000-T8 aluminum with five sections and a ball-bearing swivel system, covered by a 15-year all-weather pole warranty and backed by replacement parts matched to each model.
Frequently Asked Questions
How do telescoping flagpole locking mechanisms work?
A telescoping flagpole raises by pulling each section up until it locks. Friction locks grip the section walls with pressure, twist locks tighten a collar around the tube, spring buttons pop into drilled holes, and pin locks push a pin through aligned holes in both sections. Ball-bearing mechanisms use rolling elements to hold and release sections. The lock you have decides how the pole extends, collapses, and stays secure in place under wind load.
What is the difference between a flagpole friction lock and a telescoping flagpole pin lock?
A flagpole friction lock holds a section through clamping pressure on the tube wall, so it adjusts to any height but can slip if the surface is dirty or worn. A telescoping flagpole pin lock uses a pin through aligned holes, giving positive engagement at fixed positions. Pin locks resist slippage well but offer fewer height choices, while friction locks are more adjustable but demand clean, undamaged contact surfaces.
Why won't my telescoping flagpole sections stay extended?
Telescoping flagpole lock slipping usually traces to one of four causes: grit or salt on the contact surface, a worn or flattened locking pin, a stretched or fatigued friction collar, or a bent pole section that no longer aligns. Clean and dry the sections first, then test each lock one at a time. If a single section still drops, the lock component itself is the likely culprit and may need replacement.
How do you fix a flagpole lock that slips or sticks?
For a sticking lock, extend the pole fully, wipe the section joints with a damp cloth, dry them, and apply a thin film of silicone-based lubricant. Work the section up and down several times. For a slipping lock, check for a worn pin, a deformed collar, or debris in the engagement hole. Replace any pin that is bent or rounded, and tighten or swap a collar that no longer grips.
How often should you inspect a telescoping flagpole lock?
Inspect locking mechanisms at least twice a year, and more often in coastal or high-wind areas where salt and grit accelerate wear. Check after any major storm. Look for corrosion, bent pins, loose collars, and sections that no longer align. A quick inspection before and after the windy season catches small problems before they become a section that drops mid-display.
Can you replace a locking mechanism on a telescoping flagpole?
Yes, most locking components are replaceable. Pins, spring buttons, collars, and swivel assemblies are common replacement parts. Match the part to your pole's section diameter and lock style, since a pin sized for one tube will not fit another. Keep your pole's model and section measurements on hand when ordering, and replace the part before the next high-wind event.
How do you keep a flag from twisting around a telescoping flagpole?
Use a pole-top ball-bearing swivel system with free-spinning rings so the flag rotates with the wind instead of wrapping. Attach the top grommet to the swivel tab and the bottom grommet to a beaded retainer ring. A flag weight on the lower ring helps hold the fabric down in gusty conditions. This combination reduces tangling without adding tension that strains the locking mechanism.