

Why Cheap Telescoping Flagpoles Fail: 2026 Guide
Table of Contents
- Why Cheap Telescoping Flagpoles Fail: The Core Reasons
- Telescoping vs. Sectional Flagpoles: Which Design Fails First
- Common Locking Mechanism Failures and How They Happen
- Telescoping Flagpole Wind Rating: What Cheap Poles Can't Handle
- Best Aluminum Grade for Flagpoles: 7000 T8 vs. Standard Alloys
- Signs of Structural Fatigue and Installation Errors
- How to Maintain Telescoping Flagpoles to Prevent Failure
- Troubleshooting Stuck Sections and DIY Repair Limits
- Frequently Asked Questions
Last Updated: October 2, 2026
Why Cheap Telescoping Flagpoles Fail: The Core Reasons
A cheap telescoping flagpole usually fails for one reason: the manufacturer saved money on the two parts you can't see, the aluminum wall and the locking sleeve. Everything else, the paint, the topper, the packaging, is cosmetic. The failure happens inside the pole.
That distinction matters because it explains why so many buyers replace a pole every two or three years and assume "they all do that." They don't. This guide from Armor Flagpoles walks through the engineering behind telescoping flagpoles, the specific failure points that separate a long-lasting pole from a short-lived one, and what to check before you spend money on either.
Below, we'll show you exactly how cheap poles fail, how to spot the warning signs early, and how to maintain a telescoping pole so it outlasts the flag flying on it. But first, here's what most buying guides get wrong: they compare height and price, and never mention wall thickness or alloy grade.
Thin Aluminum Walls Buckle Under Load
Wall thickness is the single biggest predictor of telescoping pole failure. Budget poles often use thin-wall aluminum in the 0.05-inch to 0.06-inch range, and that material has almost no reserve strength when wind load concentrates at the base section. The base carries the highest bending moment of any section, so it's the first to deform.
Once a base section bends, the pole never telescopes cleanly again. Sections bind, the locking sleeve can't seat properly, and every subsequent storm makes it worse.
Armor Flagpoles builds its Superior 2 poles from 10-gauge 7000-T8 aluminum with a 3½-inch base diameter, which gives the base section far more material to resist bending. That's not marketing language; gauge and alloy grade are the two numbers worth comparing on any spec sheet.

Weak Locking Sleeves Slip and Jam
Locking sleeves hold each telescoping section at height, and they're the part most likely to fail first on a cheap pole. Thin nylon bushings, undersized spring tension, and loose tolerances let sections creep downward under load. A pole that drops six inches overnight isn't just annoying; it means the locking mechanism has already lost its grip.
The opposite failure is worse. When grit, corrosion buildup, or a bent inner section jams inside the sleeve, you can't lower the pole at all. That's when owners start forcing sections and cause real damage.
A common mistake is treating a slipping sleeve as a cosmetic issue. It isn't. Every slip event wears the bushing further, and replacement components for off-brand poles are often unavailable.
Telescoping vs. Sectional Flagpoles: Which Design Fails First
Telescoping flagpoles fail at the locking mechanism. Sectional flagpoles fail at the joints. Both designs have a weak point, but telescoping poles concentrate more stress into a smaller area, which is why locking sleeve quality matters so much on a telescoping pole.
A sectional pole assembles from separate tubes that butt together and are held by an external joint or ferrule. A telescoping pole nests five sections inside one another, each one thinner than the last, each one held by an internal locking sleeve. That nesting is what makes setup and takedown fast, and it's also what makes tolerance control critical.
On a cheap telescoping pole, the inner sections are thin enough that they flex inside the outer section. Flexing causes misalignment, and misalignment chews up bushings. A sectional pole with a sloppy joint still stands; a telescoping pole with a sloppy sleeve starts dropping.
| Failure Point | Telescoping Pole | Sectional Pole |
|---|---|---|
| Primary weak point | Locking sleeve | Joint or ferrule |
| Typical symptom | Sections slip or jam | Wobble at joint |
| Repair difficulty | Moderate to hard | Usually easy |
| Cost of neglect | Full pole replacement | Single section swap |
The takeaway: if you want a pole you can raise and lower alone, telescoping is the right design, but only if the locking hardware is built to take the load.
Common Locking Mechanism Failures and How They Happen
Locking mechanism failures fall into four categories, and each one has a distinct cause. Knowing which one you're looking at tells you whether the pole is repairable or finished.
- Sleeve slip under load: worn nylon bushings or weakened spring tension. The section creeps down in wind.
- Section jam: corrosion buildup, sand, or debris inside the sleeve, often after a season near salt spray or blowing dust.
- Collar cracking: overtightening a twist-lock collar beyond its design limit, common when owners force a stiff section.
- Swivel harness binding: the flag clips and swivel ring seize, which loads the top section unevenly and accelerates wear.
What most guides miss is that these failures compound. A jammed section gets forced, forcing bends the tube, a bent tube misaligns the sleeve, and now you have two problems instead of one.
Telescoping Flagpole Wind Rating: What Cheap Poles Can't Handle
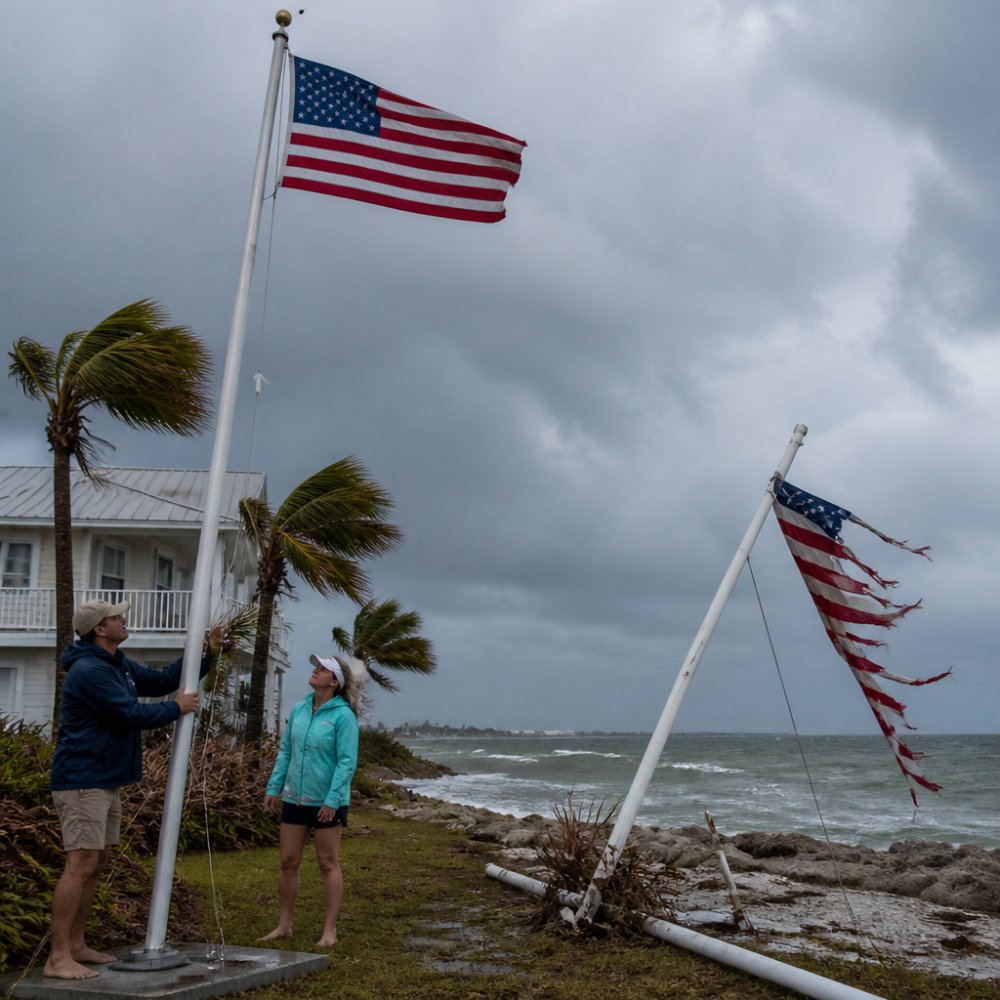
Wind doesn't break flagpoles evenly. It breaks them at the base, where bending moment peaks. A cheap telescoping flagpole rated for "high wind" on the box often has no published wind rating at all, and that omission tells you the manufacturer never tested it.
Here's the practical version. Wind load on a pole scales with the square of wind speed and with the sail area of the flag. That means doubling wind speed quadruples the load, and a 4x6 flag in a stiff gust puts a surprising amount of use on a 20-foot pole. The base section absorbs the bending moment, the mid sections handle shear stress, and the top section takes the flag's constant pull through the swivel harness.
How Wind Load Scales With Pole Height and Flag Size
Most buyers size a pole by height alone. That's the mistake that leads to failure. The load a pole actually sees depends on three variables working together: wind speed, flag area, and the height at which the flag is mounted. A flag mounted at the top of a 25-foot pole creates far more bending moment at the base than the same flag on a 15-foot pole, because the lever arm is longer.
A useful rule of thumb: as pole height increases, the base diameter and wall thickness must increase with it to keep bending stress within the alloy's yield strength. A pole that is adequately sized at 20 feet is under-built at 25 feet if the base diameter stays the same. This is why comparing two poles by height alone tells you almost nothing about which one will survive a storm.
Reading a Wind Rating Honestly
A published wind rating is only meaningful if it states the conditions: the flag size used in the test, whether the flag was flying or stowed, and the pole height. A rating of "up to 60 mph" with no flag size attached is marketing, not engineering. When you see a rating, ask three questions:
- What flag size was tested?
- Was the pole fully extended or partially nested?
- Was the flag attached at the top or mid-pole?
If the listing can't answer those, treat the rating as unverified.
Why Cheap Poles Fail This Test
Cheap poles fail wind loading in three predictable ways. The base buckles because the wall is too thin to resist the bending moment. A mid section kinks at the sleeve because the inner tube flexes inside the outer one and fatigues at the contact point. Or the swivel harness tears free and the flag whips the top section until it fatigues. None of these are fixable in the field, once the metal has yielded, the pole is done.
Matching Pole Size to Your Wind Exposure
If you live in a high-wind or coastal area, the practical approach is to size up on base diameter rather than down on height. A larger base diameter spreads the bending load across more material, which is the single most effective way to raise a pole's wind tolerance. Ask for the pole's wind rating in writing, confirm the flag size it was tested with, and check the base diameter against the height you need.
25 Ft Heavy Duty Superior 2 Telescoping →
Armor Flagpoles publishes its specs, including the 3½-inch base on the Superior 2 line, so you can compare numbers instead of slogans. This transparency helps you choose a pole you can trust in a storm.
Best Aluminum Grade for Flagpoles: 7000 T8 vs. Standard Alloys
The best aluminum grade for flagpoles in demanding conditions is 7000-series alloy in the T8 temper, because it offers significantly higher tensile strength than the 6000-series alloys used in budget poles. Tensile strength is what keeps a pole from yielding when wind load spikes. But the alloy number alone doesn't tell the whole story, temper and wall thickness matter just as much, and most buying guides skip that entirely.
What the Alloy Number Actually Means
Aluminum alloys are grouped by their primary alloying element. The 6000 series uses magnesium and silicon, which makes it easy to extrude and weld, cheap to manufacture, which is why budget poles use it. The 7000 series uses zinc as the primary alloying element, which produces a much stronger material at the cost of being harder to work with. That trade-off is exactly why cheap poles don't use it.
Most cheap poles use 6061 or 6063 aluminum. Those alloys are fine for awnings and light framing. They are not built for a 25-foot cantilever that has to shed wind load every week for a decade.
Why Temper Matters as Much as Alloy
Temper describes the heat treatment and work hardening applied to the metal. A 7000-series alloy in a softer temper gives up much of its strength advantage. T8 is the high-strength condition, it's solution heat-treated, cold-worked, then artificially aged to peak strength. That's what you want stamped on the spec sheet. A pole listed as "7000-series" without a temper designation is an incomplete spec, and incomplete specs are where cheap poles hide.
Wall Thickness: The Number Buyers Never See
Alloy and temper set the material's strength. Wall thickness determines how much of that strength is actually available to resist bending. A pole can use the best alloy in the world and still fail if the wall is thin, because bending stress concentrates at the outer surface and a thin wall has less material to carry it.
Wall thickness is measured in gauge, and lower gauge numbers mean thicker metal. A 10-gauge wall is substantially thicker than the 12- or 14-gauge walls common in budget poles. That difference is invisible in a product photo and rarely printed in a listing, which is precisely why it's the first place a manufacturer cuts cost.
Putting It Together
Three numbers decide how long a telescoping pole lasts: alloy grade, temper, and wall thickness. All three must be adequate together, a strong alloy with a thin wall still bends, and a thick wall in a soft alloy still yields. If a listing doesn't publish all three, assume the manufacturer is hiding one of them.
This is the material science breakdown most buying guides skip. Alloy, temper, and gauge together determine tensile strength, and tensile strength determines whether the pole survives the gust that would have bent a cheaper one.
Signs of Structural Fatigue and Installation Errors
Structural fatigue shows up before the pole breaks, and the warning signs are visible if you know where to look. Check these after every major storm:
- A permanent lean that wasn't there before
- Sections that no longer slide freely by hand
- Hairline cracks or shiny stress marks near the base
- Rust streaks at the sleeve where the finish has worn through
- A swivel ring that no longer spins freely under load
Installation errors cause many of the failures owners blame on the pole. The most common is a ground sleeve set too shallow or not properly compacted. A pole needs a base that resists the bending moment, and loose soil gives it nothing to push against. In-ground installation also fails when water pools inside the ground sleeve, which drives corrosion from the inside out.
Galvanic corrosion is the other silent killer. When stainless hardware contacts untreated aluminum in a wet, salty environment, the aluminum becomes the sacrificial metal. That's why long-term corrosion prevention starts with the finish and the hardware, not with a yearly coat of wax.
How to Maintain Telescoping Flagpoles to Prevent Failure
A telescoping flagpole that gets maintained twice a year will outlast an ignored pole by a wide margin. Maintenance isn't complicated, and it takes about 20 minutes.
- Lower the pole fully and wipe each section with a soft cloth to remove grit and salt residue.
- Inspect the locking sleeves for wear, cracking, or debris packed into the bushing.
- Lubricate the sleeves with a dry-film or silicone lubricant. Avoid heavy grease, which traps grit.
- Check the swivel harness and clips for free movement and replace any bent stainless clip.
- Rinse the base and ground sleeve to flush out accumulated salt and dirt.
- Raise the pole slowly and confirm each section locks with an audible, solid engagement.
A simple maintenance schedule keeps this manageable: full inspection each spring and fall, a fresh water rinse after any coastal storm, and a lubricant check before winter.
Troubleshooting Stuck Sections and DIY Repair Limits
Stuck sections are the most common telescoping pole complaint, and the fix depends entirely on why the section is stuck. Try these in order:
- Apply a penetrating lubricant at the sleeve joint and let it sit for several hours.
- Lower the pole if possible, then work the section gently by hand, never with tools.
- Flush the joint with fresh water to clear salt or sand, then re-lubricate.
- Tap the collar lightly with a rubber mallet to break corrosion bonding.
If none of that frees the section, stop. Forcing it further usually bends the inner tube, and a bent telescoping section can't be repaired at home.
DIY repair has a hard limit, and it's the point where metal has deformed. Sleeve bushings, clips, and swivel rings are replaceable components. Bent tubes, cracked collars, and buckled base sections are not. That's also where buying from a manufacturer that stocks replacement parts matters; a pole with no parts channel becomes disposable the first time a bushing wears out.
Armor Flagpoles backs its poles with a 15-year warranty on the pole and a 1-year warranty on parts and accessories, and it builds every pole in the USA from 7000-T8 aluminum. The 25 Ft Heavy Duty Superior 2 Telescoping Flagpole Kit is the flagship for high-wind properties, while the 20 Ft Superior 1 Telescoping Flagpole Kit suits homeowners who want the same alloy and gauge in a shorter, easier-to-handle package.
Cheap poles fail because the money went somewhere other than the aluminum and the locking hardware. If you're tired of replacing a pole every few years, the fix is buying one whose specs you can actually verify: 10-gauge 7000-T8 aluminum, a 3½-inch base, stainless clips, and a ball-bearing swivel ring system that keeps the flag from tangling and loading the top section unevenly. Armor Flagpoles offers poles Made in the USA and stands behind them with a 15-year pole warranty. Get started with Armor Flagpoles and stop budgeting for a replacement pole every other spring.
Frequently Asked Questions
Are telescopic flag poles any good?
Quality telescoping flagpoles are good for most residential and commercial uses. The problems come from cheap models that use thin aluminum, weak locking sleeves, and no corrosion protection. A well-built telescoping flagpole with 7000 T8 aluminum and a 10-gauge wall thickness handles high winds and lasts years. Look for a warranty of 15 years or more on the pole itself.
What causes telescoping flagpoles to bend or collapse in high winds?
Cheap telescoping flagpoles bend when wind load exceeds what their thin walls and small base can handle. A 20 mph wind on a 4x6 flag creates significant bending moment. Poles with less than 10-gauge aluminum and bases under 3 inches flex too much. The locking sleeves also slip under repeated stress, causing sections to collapse. A pole rated for high wind with a wide base and thick walls resists this.
How does aluminum gauge affect the structural integrity of a flagpole?
Aluminum gauge measures wall thickness. Lower gauge numbers mean thicker walls. A 10-gauge wall is thicker and stronger than 14-gauge or 16-gauge walls found in cheap poles. Thicker walls resist bending, shear stress, and tensile failure. They also hold locking sleeves tighter, so sections do not slip. When comparing flagpoles, ask for the gauge. If the seller does not list it, the pole is likely thin-walled.
Why do the locking mechanisms on budget flagpoles fail over time?
Budget flagpoles use plastic or thin metal locking sleeves that wear down. Spring tension weakens, nylon bushings crack, and debris builds up inside the sections. Without lubrication, the sleeves jam or fail to hold. Once a locking sleeve slips, the pole collapses. Regular maintenance with a silicone spray and cleaning the sections prevents this. Heavy-duty poles use stronger locking hardware that lasts longer.